|
|
||||
|
Business Card Menger Sponge Exhibit - Introduction |
Menger
Sponge |
|||
 |
||||
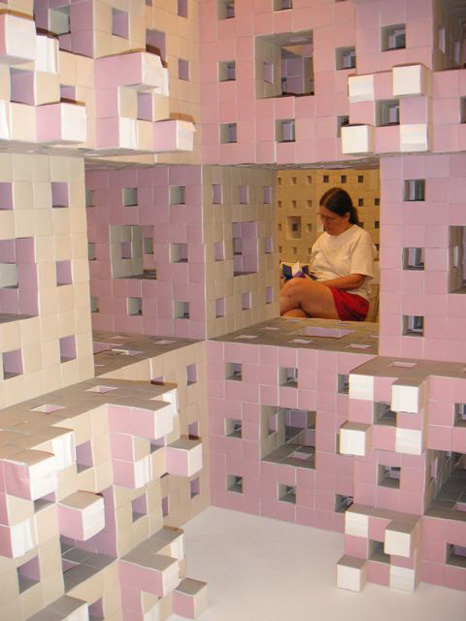
| Photo by the IFF | ||||
Menger's Sponge Menger's sponge - named for its inventor Karl Menger (1902-1985)
and sometimes wrongly called Sierpinski's Sponge - is a fractal
solid that can be described as follows. Take a cube, divide it into
27 (3 x 3 x 3) smaller cubes of the same size; now remove the cube
in the center of each face plus the cube at the center of the whole.
You are left with a structure consisting of the eight small corner
cubes plus twelve small edge cubes holding them together. Now, imagine
repeating this process on each of these remaining 20 cubes. Repeat
again. And again, ad infinitum ... |
||||
|
|
||||
| More information about fractals may be seen on the Institute’s site at this link. |
||||
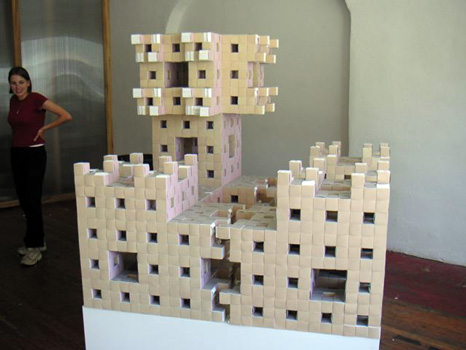
| The Business Card Menger Sponge Project The primary goal of the Business Card Menger Sponge Project was
to build a depth 3 approximation to Menger’s Sponge as shown
above, out of 66,048 business cards. This can be done by building
8000 business card cubes of 6 cards each, linking them together
and using the additional cards to panel the 18,048 exterior faces
of the sponge, giving a more pleasing finish to the final structure. |
||||
Sub-assemblies of the Business Card Sponge It was not immediately obvious what form the sub-assemblies should
take, since they would have to be joined together after they were
built. Building level 1 sponges is easy and takes about an hour
to ninety minutes. 20 level 1 sponges must be assembled to make
a level 2 sponge, and you cannot just pretend that each level 1
is a simple cube that can be easily linked. Each face of a level
1 sponge has 8 cubes which have to be linked simultaneously to those
of its neighboring level 1. Trying to link level 2 sponges is even
worse. |
||||
|
|
||||
A tripod is a block of four linked cubes, where a corner cube has three cubes attached to three adjacent faces. A sponge of any level can be broken into pieces that are combinations of one, two, three, four, six or eight tripods joined together by additional cubes. |
||||
|
||||
|
|
||||
A level 1 sponge can be made by linking 4 tripods together with 4 additional cubes. |
||||
|
||||
|
|
||||
A level 2 sponge can be made by linking 32 tripod modules: 4 single tripods, 12 double tripods, 12 triple tripods and 4 quadruple tripods, with 80 additional cubes. |
||||
|
||||
|
|
||||
|
A level 3 sponge can be made by linking 448 tripod modules: 4 single tripods, 84 double tripods, 156 triple tripods, 84 quadruple tripods, 48 double double tripods and 72 double triple tripods, with 1600 additional cubes. |
||||
|
||||
| This
tripod decomposition has many desirable features. The modules are
small and can be completed quickly, making each volunteer's contribution
relatively small. The modules are regular and easy to teach, understand
and build correctly. They can be paneled after construction. Linking
modules together is easy and does not require reaching into small,
confined spaces. After assembly, the faces of the linking cubes are
easily accessible for paneling. The tripods comprise a large percentage
(80 percent) of the final sponge. |
||||
|
||||
| Photo by the IFF | ||||
| Where did
I get all the business cards? A lot of people are curious as to where I got the 66,000 business cards needed to build the Menger's Sponge model. In February, 1995 the company I worked for changed its name. My colleagues gave me their business cards. In August, 1995, my employers moved. My colleagues gave me their business cards. After we arrived at our new location, the printers sent us business cards with the new address -- and the old zip-code. I got to keep them. This accounts for the 48,000 cards needed for the base, and some to spare. The 18,048 colored cards needed for the exterior paneling were provided by Jay Meddaugh of American Wholesale Thermographers of Woburn, Massachusetts, who saved bad print runs of colored business cards for me for several months. |
||||
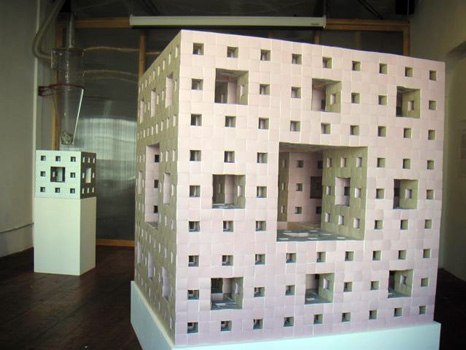
| Structural
Considerations for the Business Card Sponge The depth 0 sponge is a single business card cube. When made from standard American business cards, it measures 2" x 2" x 2". The depth 1 sponge measures 6" x 6" x 6", the depth 2 sponge measures 18" x 18" x 18", and the depth 3 sponge measures 54" x 54" x 54", or 4.5 feet or 1.37 meters on a side. Not outrageously large! (But it won't fit through my doorway or in my van!) Early on I resolved to "panel" the exterior faces of the sponge. I wanted to do this for several reasons: It would look better with all the flaps hidden. Since I would use six different colors for each of the six different planes the faces lie in, this structure would be more visible. The finished structure would be stronger, though also heavier. And, finally, it would let the individual builders incorporate their own business cards, adding their "signatures" to the work. Paneling would require an extra 18,048 cards, for a total of 66,048 cards. My largest concern was for structural integrity. 66,000 business cards are heavy. The cards that I had were of slightly higher quality than the average business card, and so a little heavier, but also a little stronger and easier to fold. They weigh about 18 ounces for a box of 500. This would make the projected weight of the finished sponge about 150 pounds (68 kg). Once built, it would not be possible to lift it off its table. I would have to build a pallet to hold it. But if it was that heavy, would the model even support its own weight? Some calculations suggested that it would. The bottom layer consists of 512 cubes which must support the weight of the entire structure. This would make the average load born by the bottom cubes of 8000/512 = 15.625 cubes. Further consideration revealed, however, that the middle layer is the sparsest layer, containing only 64 cubes, and that these must bear the weight of whole half the structure above. That would be a load of slightly more than 1 pound (.5 kg) per individual cube. I noted, however, that many of the cubes on the bottom layer would have empty space above them and wouldn't supporting anything at all. Only 64 cubes on the bottom are connected through unbroken columns to the top of the sponge. Of course, they could still distribute load laterally to their neighboring cubes (which chiefly serve to keep them from "exploding"), but as a worst case, we can imagine that these 64 cubes must carry the weight of the entire structure, with a load of around 2 pounds (1 kg) each. So I built a cube and started stacking 1 pound weights on it. (Okay, so they were 18 ounce weights.) After the stack was 10 boxes high, the cube began to show signs of stress. The other potential structural problem involved shear. Think of the level 3 sponge as a ring of eight level 2 sponges on the bottom with four level 2 sponges connecting them to another ring of eight level 2 sponges on top. Four of the top sponges are supported by a column of two sponges beneath them, but the other four are supported only through their *vertical* connections to the others. Their weight might tend to cause them to crack off. Fortunately, each of these suspended sponges, weighing around 7.5 pounds (3.5 kg), are joined to their neighbors by 64 mutually connected faces on each side. I believed the structure could support itself. After some nine years of effort, involving several hundred folders around the country, the Business Card Menger Sponge was completed. In June 2005 it was exhibited at the Origami USA annual convention in Manhattan. Since then it has continued to reside in my garage, though I hope some day to donate it to a museum. A level 4 sponge would require almost a million cards and weigh over a ton. I do not believe it could support its own weight - so a level 3 is the biggest sponge we can hope to build. |
||||
 |
||||
| Photo by the IFF | ||||
|
Make Your Own Business Card Cubes Download
full instructions for how to build your own business card sponge. |
||||
|
|
||||
| Go to Dr Mosely’s website for more information | ||||
| [ next ] | ||||
| © 2003–2018 The Institute For Figuring | ||||